This is a simple internet radio station using Icecast and liquid soap (internet radio streaming tools)
Hobbyist hardware and software from an engineer with too much time.
This is a simple internet radio station using Icecast and liquid soap (internet radio streaming tools)
I gathered four LGA775 mobo's - 3 from Craigslist and 1 from eBay. I
also gathered a few CPU's from my local PC recycler (RE-PC in Seattle)
and eBay. All of these parts are dirt cheap so I won't be heartbroken if
they die.
For my GPU I pulled my 3080 out of my daily gaming rig. So I set out to
get world records with the oldest CPUs that would run Windows 10 and a
modern GPU.
My first rig was an Intel confidential / engineering sample QX6700. I
put this under a modern Zalmann cooler - one of the only ones I could
find with LGA775. For some reason this CPU would not go above 3.2ghz. I
am pretty sure it was the CPU and not the mobo - no matter what FSB or
multiplier I gave it, it wouldn't top 3.2ghz.
I paired this with 8gb of DDR2-800 ram and hilariously, an NVMe drive on the other PCIe slot.
I got a TimeSpy overall score of 4661. The graphics scores were fine but
the CPU scores were understandably abysmal. But this is the world
record for the combination of QX6700 + RTX 3080 - because nobody has
submitted benchmarks for this combo.
dylanrush`s 3DMark - Time Spy score: 4661 marks with a GeForce RTX 3080 (320bit)
At almost 20 years old, the QX6700 was very snappy, especially with a modern SSD. I really think it would perform fine for a person just doing office work and internet browsing.
The Pentium D 805 was my first real overclocking chip. Unfortunately I
couldn't get this to properly boot into Windows 10. So I put it away for
another day. I also had a Pentium D 945. As far as I know, this is the
oldest chip that will possibly boot into Windows 10.
I put this chip between a ASUS P5W Deluxe (Intel 975X chipset) and a new
Raidmax 240mm AIO cooler. The GPU was again my 3080. This time around I
procured some 1066mhz DDR2 RAM from Corsair.
With voltages in the rather extreme range (1.65v CPU, I think 1.7v FSB
and 1.5v NB), I was able to get the CPU up to 4.9 ghz (!), stable enough
to run a benchmark.
Time Spy didn't run on this chip - probably lacking some instructions.
Fire Strike did, though. I have the lowest Fire Strike benchmark ever submitted for a 3080. But again I have the world record, this time for
the combination of Pentium D 945 + RTX 3080. I truly think I may be the
first person to ever combine this CPU and GPU. I also might be running
the fastest Pentium D in the world right now.
A wedding gift for my brother and his bride to be.
When sitting still it's a normal compass. When it's tapped or moved, it will get its position with GPS, send this to a server, and get back three bearings: the direction towards your house, the direction towards the companion compass, and magnetic north. Hold the compass so that magnetic north is under the red arrow and start walking where you need to go.
Based on the SparkFun asset tracker board
I found an IBM Aptiva 2127-E26 on Craigslist. It had a ton of charm so I decided to purchase it and restore it.
The original specs were:
It came in a quite vintage and unique 90's case.
A beige CD-RW/DVD drive is shown here which is obviously not stock. The original CD drive did not want to read some of the disks I had burned, so I replaced it with this. Unfortunately this drive quit as well so I've since replaced it again.
While the exterior is beautiful, the case is removed in a rather violent way by grabbing the front and yanking it off. This seems to have killed the original IDE hard drive and a bargain bin replacement.
Front case removed |
I also added this nice 3COM NIC from the late 90's.
I have a few computers in my office and they're all hooked up to a 4-way HDMI/USB switch. Ideally I'd be able to use this machine with the switch, so I wouldn't have to pull out a new keyboard, mouse and monitor every time I wanted to play retro games.Adding the PC to the huddle |
So I set about trying to get this old hardware working with my modern input and output. This was the most challenging part of the project.
The first challenge was the display, which was VGA only. I tried several cheap VGA to HDMI adapters all covered in this Vogons post with mixed and disappointing results. When in DOS mode, the VGA signal is 70hz, and all of the adapters I tried just tried to output 70hz to HDMI, which was not supported by my monitor.
I also snagged a Matrox G450 as a period-correct adapter with DVI input. Sadly the G450 had problems with EDID with my monitor when using DVI, but I decided to keep it anyway and to keep pursuing VGA.
Matrox G450 |
I finally landed on the Extron RGB-HDMI 300-A which almost did the job out of the box.
The one issue I had was again EDID. The Extron will pass this through HDMI by default which of course led to a broken 640x480 display in Windows. The Extron can also emulate EDID if you disable HDMI data, but the emulated 1920x1080 EDID wasn't honored by Windows - the best I could do was 1024x768. So I severed the EDID pins (#15 and #11) on my VGA cable and finally Windows stopped caring about what my monitor "supported". I was able to set a 1920x1080 resolution in Windows and now the whole thing works great.
VGA cable with the EDID pins severed |
Now on to the input. My KVM acts as a USB hub. I wouldn't be able to use the generic USB to PS2 adapters because I only have one USB connection coming from my USB KVM switch.
This computer does have USB ports, which work when you're logged on to Windows, but the
BIOS does not support HID devices, and I doubt DOS would either. I didn't want to have to grab another keyboard and mouse to use outside of Windows 98.
So I used an Arduino Uno with a Sainsmart USB Host shield to connect my keyboard and mouse. I used the ps2dev library to emulate the PS2 keyboard using GPIO pins. I tried doing this with the mouse but was unsuccessful. So I bought a TTL to RS232 adapter and use that to emulate a serial mouse.
My very rough Arduino sketch is here.
It took awhile to make this reliable but it works quite well now, with not too much lag.
The custom adapter with serial output for the mouse, and PS2 output for the keyboard. The top shield is just an Arduino proto shield so I could solder the PS2 and serial connections. |
USB input on the middle shield |
I named this PC "Little Blue" - after IBM's now sort of antiquated nickname of "Big Blue"
The bad ass boot logo |
Old school Roller Coaster Tycoon |
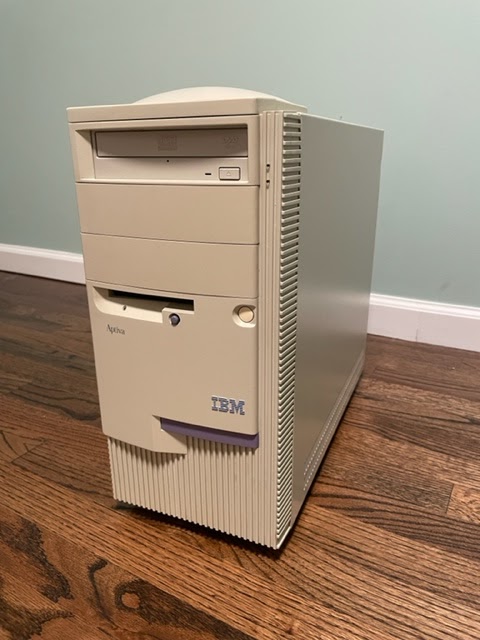
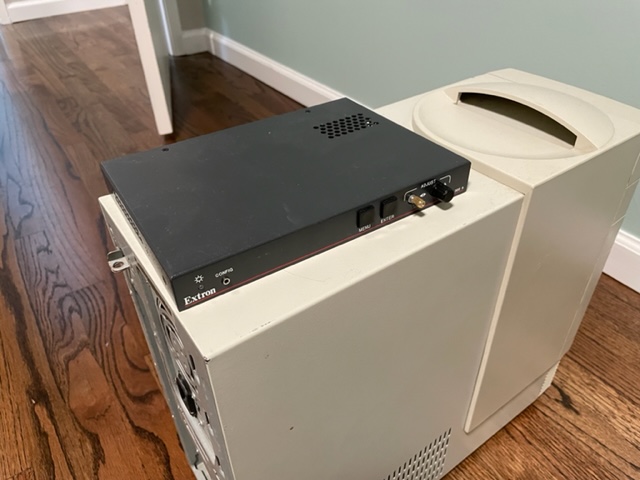
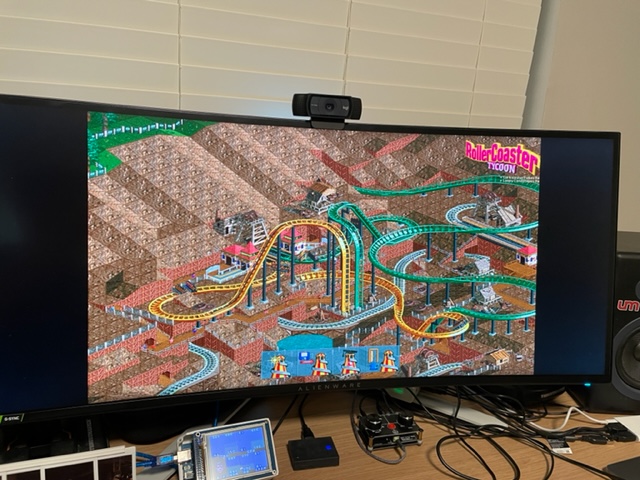
My favorite video game of all time is Morrowind. OpenMW is an awesome port of the old game. I wanted to get OpenMW to run on my 2002 gaming PC build just to see if I could.
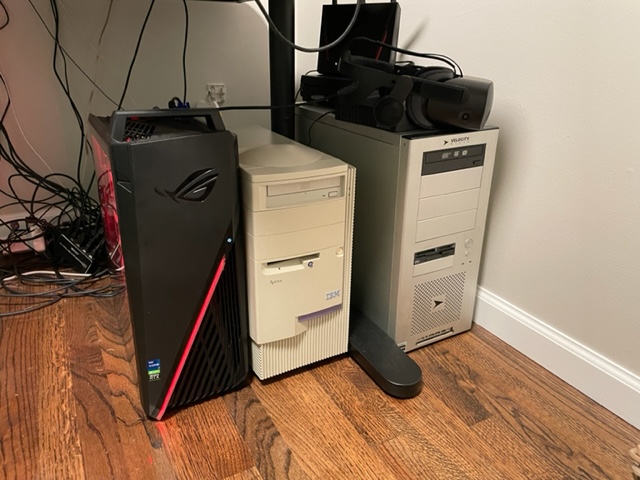
My legacy gaming PC has the following specs, which would have been very typical for a PC gamer around the time Morrowind came out.
- Athlon XP-M overclocked to 2.4 ghz
- Radeon 9550XL
- 2GB DDR400 dual channel RAM
I've found out that this is an incredibly difficult processor to target because it lacks SSE2 instructions. SSE2 happens to haphazardly be built into many binaries because it's assumed to exist on all modern hardware, and has since the Pentium 4. SSE2 instructions have notably snuck their way into firefox, which makes that browser impossible to build for my machine.
My processor is also 32 bit. OpenMW has a 32 bit (aka x86). While OpenMW has 32 bit builds for Windows, but they contain SSE2. Actually building the x86 version yourself is not really supported. Furthermore, the whole Windows toolchain is based on the latest Visual Studio, which does not allow you to forego SSE2.
Linux x86 binaries are no longer provided by the OpenMW team. Downloading the last x86 build, version 0.45, results in a segfault - probably due to missing SSE2 instructions again.
So I had to build OpenMW myself. I found a Gentoo package for OpenMW which would compile everything I needed. I decided to give Gentoo a shot because it might also let me compile my own compatible web browsers. This ended up being a very long process, as gentoo users are familiar with. I had to build and configure the whole operating from scratch, starting with the kernel.
I started up an i686 build of Gentoo in a virtual machine on my modern PC to be copied over to the old box after all the setup was complete. Compiling everything on the Athlon would likely take weeks.
After walking through the Gentoo installation manual I had a working terminal in 32 bits, but there were many snags on the way to a full desktop environment (xfce4).
The first snag was rustc. There are several packages which depend on rust. Rustc is a self-compiling compiler, which means it has to be bootstrapped. The rust compiler targeted for i686 contains SSE2 instructions, as described in gentoo bug 741708, which means that my Athlon could never bootstrap. I wanted to treat my VM like the physical machine so as not to run into any problems in the future, so I decided to compile rustc myself elsewhere then sideload the compatible binary.
My config.toml looks like this, which allows rustc to target either i586 or i686. In the end I ended up targeting i686 anyway (I think i586 broke librsvg) but it's good to have the i586 support. And this is compiled to match my instruction set.
changelog-seen = 2
[llvm]
cflags = "-march=\"athlon-4\" -m32"
cxxflags = "-march=\"athlon-4\" -m32"
ldflags = "-lz"
[build]
host = ["i586-unknown-linux-gnu", "i686-unknown-linux-gnu"] extended = true
configure-args = ['--build=i586-unknown-linux-gnu', '--prefix=/opt']
[install]
prefix = "/mnt/disk2/rust/install/opt"
[rust]
[target.x86_64-unknown-linux-gnu]
[dist]
I also had to avoid spidermonkey, which is not only a gargantuan thing to compile, but seemed to crash during compilation whether I used my sideloaded rustc or the one from dev-lang/rust-bin (I'm not even sure if rust caused the problem, but I had no interest in compiling spidermonkey. This reddit post helped me replace it with a more lightweight library (duktape)).
I also had to patch Qt5 to make it compatible with non-SSE2.
Eventually I was able to build xfce4 and OpenMW, and I was able to get in the OpenMW launch in my x86 VM:
This gave me hope that I could transfer the OS over to my old computer and get playing. Astonishingly, all I had to do was create a tarball of the root on my VM, and then extract that tarball to a new partition on my old PC. I just had to update the fstab and network config, run update-grub, and the operating system born in a VM was not running on a physical machine.
xfce didn't quite work though. The window manager crashes, so you lose window borders and close buttons. Luckily this didn't stop me from launching a terminal and eventually launching OpenMW.
I wasn't able to start the game from the main menu, but I could start the game from a random cell, which allowed me to start a new game from there.
Water was completely transparent.
It ran at about 2 FPS at 800x600. For comparison, the original Morrowind binary runs at around 30 FPS at around 1024x768. So not surprisingly, either OpenMW is just not optimized for my ancient hardware, or I could have some problem with my drivers.
Delidding my i7-4790k brought temps when gaming from 85C to around 70C.
Unfortunately with air cooling, I couldn't get it above 1.35 volts without reaching a thermal limit. But, I am stable at 1.285 volts, 4.8 ghz, which is a very good overclock for this chip (20%). About 7 years on, there is still plenty life in my Haswell for modern gaming. My 1080ti is dying (it's down to one HDMI port so VR is becoming difficult) but I may just upgrade to a modern graphics card and keep this beautiful processor.
The hardest thing about using the Athlon XP processor is not just that it's 32 bit, but it lacks support for the SSE2 instruction set. This means most programs compiled after say 2008 are not going to work on it, even if they are 32 bit. I believe Microsoft even dropped support for disabling SSE2 in Visual Studio after a certain point, so it may not be possible to recompile many of these programs even if the source code is available.
If you want to get on the web, you have a few options:
1. Use an old version of FireFox
2. Use an off-brand browser.
PaleMoon did have a non-SSE2 fork running for awhile, but I think this was discontinued around 2017. If you keep Googling non-SSE2 browsers, don't be mislead by anyone recommending PaleMoon.
K-Meleon for Windows works pretty well. It's not as good as Firefox, but is hypothetically more secure because it's actively maintained.
Few versions of Linux will work on an Athlon XP. LXLE does not install, likely because of the SSE2 problem. MX Linux does! I'm new to this distro but it's Debian based and works rather well.
On MX Linux, I was able to install NetSurf, which is still maintained yet a fairly old school browser. I was also able to run K-Meleon through Wine and browse the web just fine. With a modern operating system and an up-to-date browser, I'm actually able to use this ~18 year old computer for most tasks. I really hope this software continues to be maintained.
I had tried flashing the Radeon with several different BIOS ROMs that I had downloaded from techpowerup.com. Many of these would boot button Windows would not recognize the drivers. I bought a working replacement off of eBay and harvested the BIOS from that. The dead Radeon booted with the new BIOS, but there were still artifacts.
Finally, as a last resort, I heard of some people reflowing their GPUs. Over time, a GPU may lose its reliability due to degradation between the chips and the PCBs. I read somewhere that most solders will melt at just over 200 degrees centigrade. So I shoved the card in my oven for about 10 minutes. Unfortunately it didn't help. I sadly could not repair this card and sent it off for recycling. But the replacement card from eBay will work in its place.
As described in my last post I had a few ingredients to play with. For motherboards I had the BioStar M7NCD and the MSI K7N2. Both were based off the nVidia nForce2 chipset which was renowned at the time for stability, feature set and overclocking capability. For the CPUs I had an Athlon XP-M 2500+ (AXMH2500FQQ4C) and an Athlon XP-M 2800+ (AXMJ2800FHQ4C). The 2500+ is a historical overclocker. Most people from that era steered away from the 2800+ it seems, maybe due to price point. For that reason, I actually did most of my initial experimentation on the 2800+, thinking the 2500+ would fare better.
I approached this like most CPU overclocking tasks and first found the highest stable voltage I could go, then increased the FSB or multiplier to reach the highest frequency at the given voltage.
There was one problem. The MSI allows for dual channel memory while the BioStar does not. Because of this, I decided the MSI was my favorite, and I would not do any potentially destructive experiments on the MSI board. The BioStar would be my guinea pig. However, the MSI allows you to select different voltages, but the BioStar does not. So I needed to do a pin mod to change the CPU voltage on the BioStar. The pin mod would also allow multipliers above 12.5x, which didn't end up being necessary as we'll soon see.
The pin mod guide from ocinside.de
A pin mod is a modification to your motherboard or CPU in which you short out certain contacts between CPU pins in order to change the recommended voltage, FSB or multiplier reported by the CPU to the motherboard. Some motherboards allow you to override all of these settings, and on these motherboards pin mods are useless. Other cheaper motherboards will just go with whatever the CPU reports. On these motherboards a pin mod can be necessary to override these settings. Note that pin mods are an antiquated concept and you probably can't do this in a modern computer.
I used the MSI board to find the max voltage for the 2800+ and the BioStar to explore the max frequencies. I used the pin mod to set the BioStar's voltage and multiplier to a sufficient amount (1.75 and 15x respectively) and played with the FSB to find a max frequency.
If you zoom in very close to the picture below you may be able to see the fine copper wires I placed between CPU pins.
Another consideration of the pin mod is that the voltage changes are only additive unless you cut the L11 bridge. This basically means taking a pocket knife to the right spot on your processor to un-short a few contacts on the PCB.
So with the bridges cut and the processor's voltage and multiplier set, I continued to experiment with the FSB to find the max frequency. This turned out to be 2.4 ghz for the 2800+ and 2.1 ghz out of the 2500+.
That was cool, but for all the hype I was expecting more out of the 2500+. This could only get up to 2.1ghz stable. So the cheaper 2800+ was actually more performant.
The 15x multiplier I was initially using ended up being useless. For awhile I thought that these processors were FSB limited (as had been my experience with modern Intel processors) but in reality they were just limited with their overall clock. So my best chip, the 2800+, is sitting pretty at 200mhz FSB and a 12x multiplier.
Overall I'm happy with the outcome. While some people in 2002-2003 were reporting excessive clock frequencies of 2.7ghz or more, I feel that with 2.4 ghz with this build, still outperforming the flagship Athlon 3200+ of this processor line, it is actually a very good overclock.
Unfortunately there were some casualties along the way. After discovering the max clocks between the boards and chips that I had, I also decided to play with the coolers to see which was best. I snagged this super weird dual-fan cooler. It is loud as fuck and did not cool the CPUs any better than my $5 near-stock aluminum fins that I got from my PC recycler.
In this process I managed to burn both my BioStar motherboard and my 2500+. Long story short, if you're doing a pin mod, be really careful when replacing the CPU.
The Radeon 9550XL is a renowned overclocker for its time. Although my first pick died, my $25 eBay replacement worked great. So I started overclocking it.
The process for overclocking a 9550 or other similar Radeon 9xxx series card of the time is rather straightforward. These are cards that were intentionally downclocked in order to fit in a certain market segment. They have much more capability than what they are configured for. You can overclock them very easily, but the stock ATI drivers will reset the configuration. God forbid you get more performance than what you paid for. So there are certain utilities like ATITool from techpowerup that will allow you to overclock and also override the drivers. You can also reflash the BIOS to trick the computer into thinking that you have a totally different GPU with higher frequencies, but only if you find your card can support those frequencies. The 9550 or 9550XL could often be flashed to a 9600XT, but mine could not. You need to find the max supported frequencies first before flashing.
Either way, when overclocking this card it is prudent to provide extra cooling. You want to cool both the GPU and the RAM.
So I just cranked up the GPU as far as it would go in ATITool.
I went from the stock frequencies of 250mhz core/200mhz memory with 35 FPS average on the ATITool test to 425mhz core / 270mhz memory. That is about a 70% and a 35% overclock, respectively.